Making Your Own Rocks for Kids | How to Make Rocks from Clay: A Tasty Treat to Make at Home
Every so often, I ask myself what it was like to be a child again – those innocent, joyful afternoons filled with imaginative play and colorful crafts. One memory that tugs at my heartstrings is the thrill of making little treasures with my hands, allowing my creativity to run wild. It reminds me of those unique times we made our own mini "rocks" out of clay, and I can’t help but smile at how those moments were filled with laughter and wonder.
Today, I’d love to share this delightful adventure of making your own rocks from clay – a fun and engaging project that’s not only easy but also a wonderful way to foster creativity in kids. These charming little creations can be used as decorative pieces, fun toys, or even personalized gifts! This is one you’ll definitely want to pin for later!
Why You’ll Love This Recipe
- Easy and Engaging: Perfect for all ages, making it an ideal activity for cozy family nights or playdates.
- Creativity Unleashed: Provides an opportunity for children to express themselves through vibrant colors and textures.
- Quick Preparation: With minimal ingredients and no baking involved, you can start your crafting adventure in no time!
- Family-Friendly Fun: A great way to bond with your loved ones while creating unique keepsakes.
- Hands-On Learning: Helps kids learn about shapes, colors, and the joy of hands-on crafting.
What You’ll Need
Gather these simple ingredients:
- 2 cups of flour
- 1 cup of salt
- 2 cups of water
- 1 tablespoon of oil
- Food coloring (your favorite shades!)
- Non-stick cooking spray (for easy cleanup)
How to Make Making Your Own Rocks for Kids | How to Make Rocks from Clay
Let’s make it together! Here are the cozy, step-by-step instructions:
-
Combine Ingredients: In a large bowl, mix the flour and salt thoroughly. This blend is the perfect base for your clay rocks.
-
Add Water and Oil: Slowly pour in the water and oil while mixing. I recommend using your hands for the best results—there’s something wonderfully satisfying about squishing all the ingredients together!
-
Knead the Mixture: Once the ingredients come together, knead the mixture for about 5 minutes until it reaches a smooth and pliable consistency. It should feel tender to the touch, like the perfect dough.
-
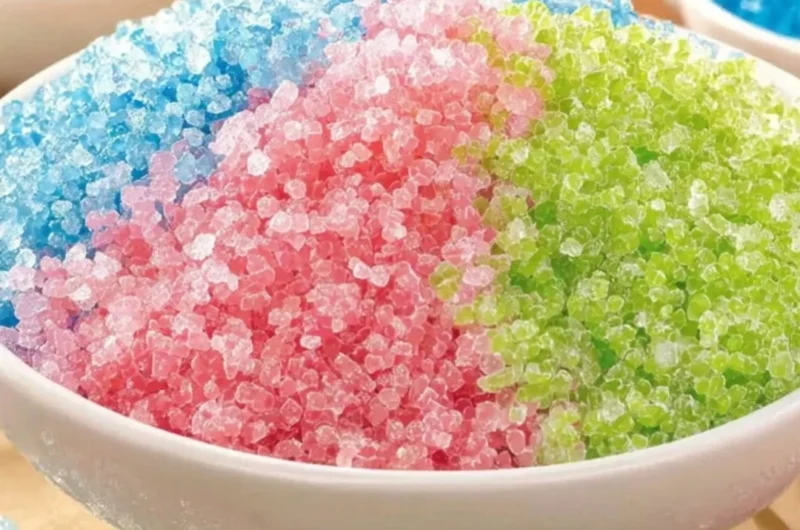
Color It Up: Divide the dough into smaller portions, and add a few drops of food coloring to each. You can create vibrant blues, zesty greens, sunny yellows—whatever strikes your fancy! Knead until the colors are well combined.
-
Shape Your Rocks: Now comes the fun part! Roll and shape the colored dough into little rocks. Have fun with it; they can be smooth or textured, round or jagged. Let your imagination soar!
-
Drying Time: Place your creations on a baking sheet lined with parchment paper and allow them to air dry for at least 24 hours. Alternatively, you can bake them on low heat (about 200°F/93°C) for 2–3 hours.
-
Finish and Display: Once dry, feel free to paint them for added flair or leave them natural – the choice is yours!
Fun Ways to Customize It
- Texture Additions: To create a more sophisticated look, try pressing leaves or shells into the dough before it dries for a beautiful textured finish.
- Paint Party: After drying, host a mini painting party, letting each child add their unique designs with non-toxic paints.
- Magical Glow: Mix in some glow-in-the-dark powder to create enchanting rocks that illuminate in the dark—perfect for a nighttime treasure hunt!
- Theme Rocks: Create seasonal rocks—think pastel colors for spring or rich earth tones for autumn. Use these as decorations around the house!
Chef Emma’s Helpful Tips
- Make-Ahead Advice: The dough can be stored in an airtight container in the fridge for up to a week if you want to stretch the crafting sessions over a few days.
- Alternative Ingredients: If you prefer a gluten-free option, substitute the flour with a gluten-free blend—just make sure the texture remains similar to the original!
- Storage Suggestions: Once dried, keep your clay rocks in a cool, dry place to maintain their vibrancy. If they lose their color, a quick spray of sealant can bring them back to life!
Nutrition Information per Serving
While this recipe isn’t for a dish you’d eat, here’s what’s inside—because we know kids sometimes taste test:
- Serving Size: N/A
- Calories: 0 (non-edible)
- Carbohydrates: 0g
- Sugar: 0g
- Fat: 0g
- Protein: 0g
- Sodium: 0g
Frequently Asked Questions
Can I make this ahead?
Absolutely! The clay mixture can be made ahead and stored in an airtight container for a week.
Can I use different ingredients?
Yes, you can experiment with different types of flour or add spices for a fun scent.
How do I store leftovers?
Any unused dough can be stored in the fridge. Just keep it in an airtight container!
How long does it last?
Once dried, your clay rocks can last for years if stored properly.
Wrapping It Up
Creating your own rocks from clay is not just a project; it’s a heartwarming experience full of treasured memories in the making. Allow your little ones to immerse themselves in the process, and watch their creativity blossom! This activity isn’t just for kids—it’s a delightful way to spend time with loved ones, share stories, and create lasting keepsakes together.
Save this Making Your Own Rocks for Kids | How to Make Rocks from Clay, Tasty Treats to Make at Home to your DIY and craft board so it’s ready when you need a cozy activity with your family! Happy crafting!

Making Your Own Rocks for Kids
- Total Time: 130 minutes
- Yield: Varies
- Diet: N/A
Description
A fun and engaging project for kids to make colorful rocks from clay, fostering creativity and imaginative play.
Ingredients
- 2 cups of flour
- 1 cup of salt
- 2 cups of water
- 1 tablespoon of oil
- Food coloring (your favorite shades)
- Non-stick cooking spray (for easy cleanup)
Instructions
- Combine the flour and salt in a large bowl.
- Add water and oil while mixing with your hands.
- Knead the mixture for about 5 minutes until smooth.
- Color the dough by adding food coloring and kneading until combined.
- Shape the dough into little rocks.
- Drying time: Let them air dry for 24 hours or bake at low heat for 2–3 hours.
- Finish and display your creations however you like!
Notes
You can customize your rocks with textures, paints, or even glow-in-the-dark powder!
- Prep Time: 10 minutes
- Cook Time: 120 minutes
- Category: Craft
- Method: Crafting
- Cuisine: N/A
Nutrition
- Serving Size: N/A
- Calories: 0
- Sugar: 0g
- Sodium: 0mg
- Fat: 0g
- Saturated Fat: 0g
- Unsaturated Fat: 0g
- Trans Fat: 0g
- Carbohydrates: 0g
- Fiber: 0g
- Protein: 0g
- Cholesterol: 0mg